Dec 1, 2011

Cardboard kitchen part II

First part of the kitchen is ready for final impregnation and coloring afterwards. Here are some photos.


Nov 26, 2011

How to create a cardboard door

I had real problem to find out how to implement cardboard door into the carton furniture. There are several solution on this subject you may find on Internet, but I didn't really like any. And then I read it on the blog of  Marie Krtonne who creates such wonderful cardboard furniture which fascinates me each time when I am there.

I followed Marie's instructions but I also added two new details.
  • I fixed a piece of material inside of the door, in order to protect additionally eventual damage on it. I decided to put Vlieseline which is a bit elastic. I have fixed it with wood glue diluted with water, I let it dry and was absolutely satisfied with reached effect. The Vlieseline melted into the carton so I think it is now very good protected.
  • I have prolonged the side length which should be fixed inside of the furniture and took the real dimension of the side part - width and height. I am not really sure if this is absolutely necessary, but anyway I have better feeling of fortification.
This big door is still not implemented, but the I have done the small one. Here is the result.

Comment réaliser une porte en carton

J'avais vraiment un problem d'implementer la porte dans un meuble en carton. Il y en a quelques solutions que j'ai pu trouver sur l'Intrenet mais aucune ne me satisfait pas. Et là, je l'ai trouvée sur le blog de Marie Krtonne, qui fait un meuble en carton tellement magnifique, que je reste absolument fascinée par la beaute et la précision de création.
 
Je suivais les instructions de Marie mais aussi j'ajoutais deux choses nouvelles.
  •  J'ai fixé un morceau de matériau à l'intérieur de la porte, afin de la protéger des dommages possibles. Je me suis décidée d'user Vlieseline qui est un peu élastique. Je l'ai fixé avec la colle à bois diluée avec un peu d'eau, je laisse sécher et j'étais absolument satisfaite de l'effet obtenu. Le Vlieseline est bien fondu dans le carton, donc je pense qu'il est maintenant très bien protégé.
  • J'ai prolongé la longueur du côté qui devrait être fixée à l'intérieur de meuble et j'ai pris la dimension réelle de la partie latérale - largeur et hauteur. Je ne suis pas vraiment sûre si cela est absolument nécessaire, mais de toute façon j'ai le sentiment que la porte sera mieux fortifiée


Cette grande porte n'est pas encore implementée, mais j'ai fait la petite. Voilà le résultat.

Nov 25, 2011

Cardboard Kitchen


If I had not promised in my last post to start with the creation of the cardboard kitchen, I would not probably have begun this project yet. But I promised, so I had to. And imp has visited me, as AN would say in one of her posts: I have been haunted! First I draw the kitchen parts in the way I would like my kitchen to look like (honestly speaking, I do not need it at all:). It is only a rough draft, most probably the kitchen will not look like this at the end.

Kuhinja od kartona

Very soon the manic cardboard cutting has been started. At first I wanted to make kitchen in one piece, but I resigned of that idea very quickly, for two reasons. The length of the kitchen should be 2m70 and I do have a problem to find or buy so long carton pieces; on the other hand, I have terrible need to move my furniture once in 3 months.  In this way I give to the general house cleaning a higher goal.


So, what I got so far is a third of whole cardboard kitchen.I must admit, I'm very proud that I managed to make a cardboard door for which I am almost 100% sure it won't get destroyed by time. Here some images and in the next post I'll discover the secret of creating cardboard door.
I apologize in advance because of poor image quality, but I simply cannot catch the daylight on weekdays


Cardboard kitchen
Cuisine en carton

Oct 13, 2011

Bender on mobile bag

Another mobile bag is born, Bender, a wish of my dear friend. He has birthday tomorrow and this bag is made for his girlfriend. I am very glad he can give her such a present. And he will get tomorrow something special,  that I will share here with you too... Untill tomorrow.

Oct 10, 2011

Mobile bag with abstract motive

One more mobile bag has been created. Since it was question about urgent order, I could hardly get even this photo. But I promise, in some further posts, I will make step-by-step tutorial how to make such a bag by yourself. It's easy, it makes fun and it is ideal way to use rests on tissues that still didn't find better purpose and you feel too sorry to throw them away.


.

Sep 14, 2011

Cardboard mirrow

This mirrow is one of my first trials to make something out of cartons. In order to provoke me, and to make me lough a dear friend of mine said following, as he first saw it: "Wow, how great it is, and so practical! One can synchronously shave his underarms."  Of course this was not my aim:))) but he reached his goal. I didn't have any aim, the mirrow is not practical at all, but I did like the creative solution. And this one I got somewhere on the Belgrade streets, so I tried to make something similar. Here it is.

Aug 17, 2011

Skirt

Slowly I am coming back to the daily life. I cannot still start any carton project, so sewing... I made a skirt last night... However, I am still not sure if I should add some more details on the bottom of the skirt, any comment is welcome. First I wanted it, but later on I resigned of that idea.


Aug 14, 2011

Dress

I was off for a while, visiting seaside cost, enjoying every moment of it, and I really got some rest. I find it now pretty hard to return to my everyday life. I am searching everywhere for salty water, I envy the birds which will soon pack up and fly away. Eh...
Since I cannot still put myself together, here is again one of my earlier works. Sewing is my passion, the only hobby I always return to. And this is one of my favorite dress, although I wear dresses rarely.


Jul 6, 2011

Multifunctional cardboard shelf II

I was away for a while. The shelf took more effort than I thought. Maybe I was also overtired lately, so the fatigue took me under control. However, the shelf is now done, my niece is mostly responsible for the final decoration, as it belongs to her. I haven't made lot of photos this time, I couldn't reach it, she has already brought it at her place.


Jul 5, 2011

Multifunctional cardboard shelf


I have already mentioned that we have started a new project (my niece and I). This should serve mostly as a book-shelf, but regarding the chosen form, the parts of the shelf can be used as table or chairs or perhaps a flower stander... or whatever comes into your mind.
It consists of several basically separated boxes which have hole in the front part and some of them will have a hole on the back, depending on the inspiration in the specific moment.
Up to now we reached to create one box and a half, we aim to have at least 10 of it, we will decide it ad hoc. Here some images.


Jun 20, 2011

Cardboard drawer part III

At one moment the shelf looked like this, and afterward I haven't taken any photo until it was done completely.


I like old furniture in general, so I tried to reach old effect also on this one and I think more or less I reached that aim. The front doors are also there. All in all I am very satisfied with final results. Special thanks to my niece who is helping me in creation of the carton furniture. Special thanks to dear God, who finally helped also to her to find a matter of interests that last more then one hour. We have already started a new project, I will write later about it.


Jun 16, 2011

Cardboard drawer part II

As I promised in my last post, I publish some photos of a drawer. First I cut front parts. Two of them look like this (the back part of the drawer has identical size but no cuts in the middle of it, so I haven't taken a photo of it).


I cut around 40 pieces of cross parts that serve to bind front, middle and back parts together. The most boring but absolutely necessary part of work is to fix all joints with a tape.


For the moment, the drawer looks like this.


Jun 15, 2011

Cardboard drawer

I have to admit, that I am not really a cook. Everyone who knows me in person would agree with this statement. I simply do not like to cook, neither for one person nor for two or three, and for more than this- I got really sick. That's why I do have a small cooker with two hotplates and an oven, and it will probably die NEVER. It serves mostly to boil water for Turkish coffee, that I like the most, so some kettle makes not much sense.

My cook is standing now on such wooden board placed on a heater. All this looks pretty ugly, so I will not make a photo of it.

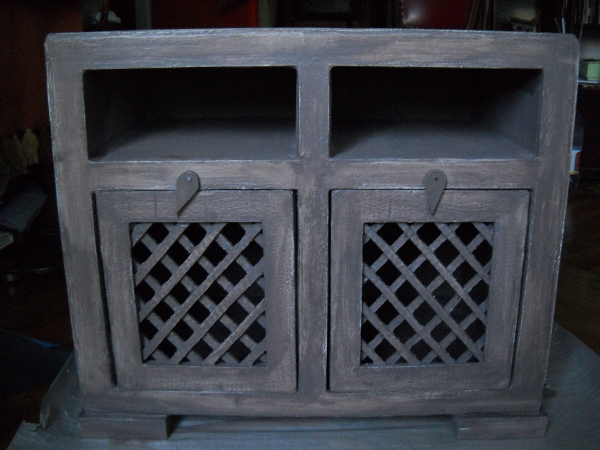
Since I discovered the carton furniture, I finally decided to deal with my kitchen. I only hope I will not start to throw out wooden furniture in order to replace it with carton one, as lot of people (at least in Serbia) exchange their parquet floor with laminate! My aim is to create carton drawer on which I would put my cook, and that should look more or less like this.


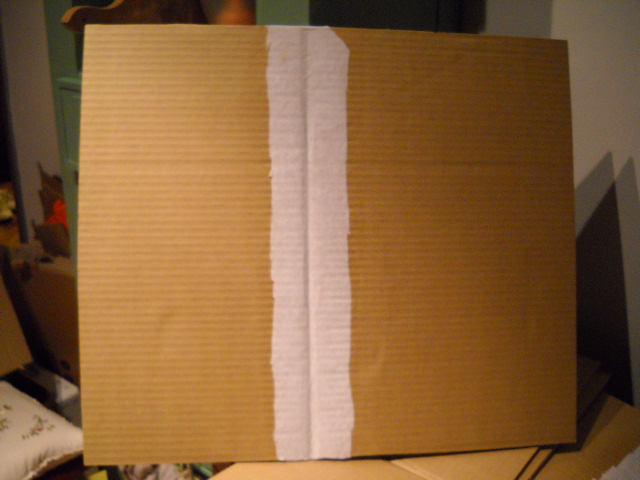
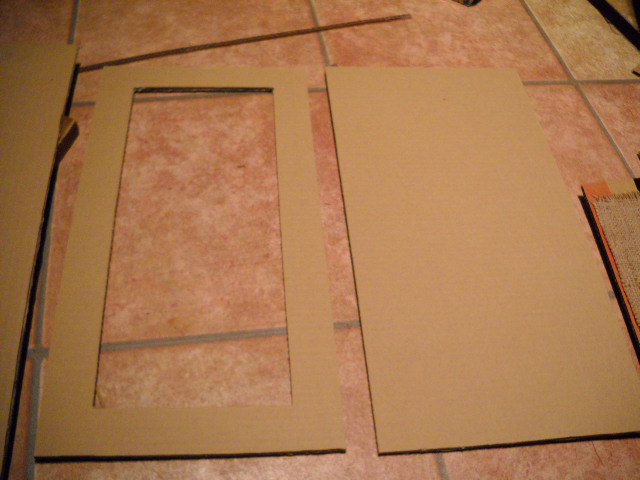
This small project nears already its pre-final phase, the construction is done, drawers and doors are still missing. Tomorrow I will post images. I haven't seen on Internet that someone did a classical drawer door on carton furniture, I am really eager to know if it's possible.

Jun 12, 2011

A bag with abstract theme

The kitchen shelf has exhausted me a lot. After I have finished it, somehow I felt like being in a light depressive state. From this state a bag with abstract theme has come out (I found an image on photobucket.com which has inspired me).


Another bag, which is still not finished is inspired by an image of Kandinky. On the photos you may see how it looked like before I sewed the pieces and after that.


Jun 7, 2011

Cardboard shelf part VI and that's it

So finally done! Honestly, I thought this would never happen. In my last post I have already mentioned, that I would try to make some small resume of stuff I used in order to create a shelf.
Please note that I am very negligent concerning the costs and writing it all down, but here are some rough information:
  • around 12 boxes used mostly for relocation (a lot of parts are left since I couldn't use them because they were too small for this shelf)
  • 1kg 1/2 of wood glue
  • 1kg 1/2 acrylic wood putty (I hope this is the right word for it)
  • a bit of linseed oil, around 50ml
  • 1kg white primary color for wood
  • 1/2 kg specific glue also for wood, but it works for some other stuff, like gum or shoes.
  • 1/2 kg acryllic wood varnish
  • 1kg yellow acrylic color
  • a bit of blue, black, brawn color (I used walls' toner)
  • 1/2m jute tissue
  • 1/2m cotton tissue (beige color)
  • a bit of rope
  • 1/4m tissue with stripes.
  • around 40 pieces of hot glue sticks
This is it. It costed me around 70 euros, but note that I still have something left - for smaller shelf perhaps.
And finally, this is what came out of it:


I samo jos da primetim, fotografijom se nikada necu baviti:)))
Just to mention, I will never go in for photography:)))

Jun 1, 2011

Cardboard kitchen shelf- part V


The end is almost there, unfortunately  I have still a billion ideas what I could still add on it. When everything is done, I will try to make small resume of the stuff I used, I believe it could be useful for those who would like to create similar things. The shelf mutated from white into green. I glued pressed cowslip (primula veris) on the shelf's sides (I need some more flowers for the front side, so I guess the shelf will be  updated in spring next year:)). I covered the top (still not fixed). Here some images.

May 26, 2011

Cardboard kitchen shelf - part IV


Did I say in my last post 'one more night'? I really do overestimate me.
I will correct me now and say - still thousand and one night left.
The construction took finally its end, the shelf is ready for final coloring, we both got some white color, the drawers are bit late in process and I am still not sure if I would like to cover it on the top or not. This will be decided spontaneously and I would appreciate any suggestion.


These two mobile bags have took part in one winning game organized by the company I am working at. That's why the carton shelf had to suffer a bit...

May 25, 2011

Cardboard kitchen shelf - part III


Construction almost done.  One more night ...

May 24, 2011

Cardboard kitchen shelf - part II


After two nights, the construction is taking its end. It goes really slowly and I wish I had a magic stick. I am still satisfied with results obtained, there are some small mistakes but I put all my hope in the pressed carton which I used at last in order to cover whole construction. I do not like effect produced by newspaper glued over it, the pressed carton gives a perfect surface. I have already glued the pressed carton on some places, but I am not sure if the difference can be noticed. This is image of how it looked day before yesterday.


My wonderful assistant is always there to help if something goes wrong.

Today it looks like this.  Few days left to finish the construction

May 20, 2011

Stickman in love

Do not think I was lazy. And I didn't give up from my cardboard shelf, I just moved this 'one' night to monday. I had to create something else for my dearest friend who happened to become an owner of this small mobile bag for iPhone.

The bag has motives on both sides and it looks like this.


May 12, 2011

Carboard tablet


The tablet is still not ready. I understood that I have to make several projects at the same time, since I am very impatient one and I really do have a problem to respect the necessary time the carton needs to get dry well. I fixed some additional floral part on my tablet, also made of carton, but the thin one (I used a shoe box). So here it is how it looked before I colored it.

Carton tablet, kartonski posluzavnik


I will try to obtain some antic view of it, but I am not sure that I will succeed in it. More photos anyway later on.

May 11, 2011

Carton kitchen shelf

And after these two experimental small projects, of course the bigger one.
Up to now it looks like this. It took me 2 and half days to cut parts and to reach this point.

Carton kitchen shelf upside down

Carton kitchen shelf